No products in the basket.
Blog
Guide to Silt Traps and Why You Should Consider One!
If you have found that the area surrounding your property is often covered in surface water, you might be considering installing a soakaway drainage system to handle it. If you don’t already know, a soakaway is basically a system that involves digging a large hole in the ground and filling it with plastic crates that create a large void underground that can hold water before slowly re-dispersing it back into the soil at a rate the ground can handle. This reduces or completely solves the flooding issues in that area, making soakaways a great solution for clogged lawns and gardens with standing surface water.
While soakaways in the past consisted of simply digging a hole and filling it with rubble, modern solutions like soakaway crates have improved the efficiency of these systems significantly.
However, the lifespan of your soakaway crate can be dramatically reduced if it becomes clogged with dirt and silt, leading to reduction in performance of the whole system, eventually requiring a full replacement. This is why we recommend using a silt trap. Here, we’ll go over why you should include a silt trap in your soakaway system, the different types of silt trap you can use, and how you go about installing a silt trap. After all, what’s the point in buying and installing a whole drainage system if it’s only going to last you a few years at most?
Why Silt Traps Are Important
When you put something like a soakaway system into place, you want to make sure that it’s functional for as long as possible – otherwise, you could have some costly issues on your hands. The main reason why soakaway crates become less effective is the system becoming clogged which fills the crates where the water should be, clogging can be caused by the ingress of silt, soil, pesticides, sediment, metals, and other particles inside the system. If these substances enter your system with the rainwater, they can make the crate system far less effective, and you may need to install a new one in the long run after you notice that your lawn is flooding again!
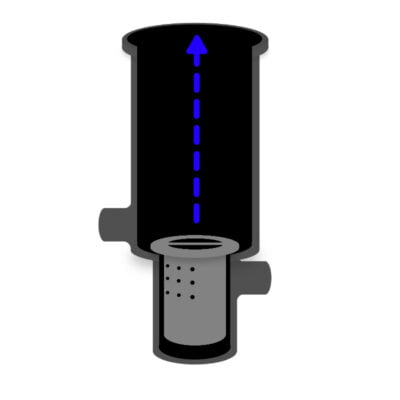
To prevent this, you can install a silt trap. They look like a vertical pipe or tube, and have an inlet higher than the outlet to help trap dirt. They function by allowing the dirty water to enter at the higher level, and the clean water exits at the lower level, leaving the silt and dirt at the bottom of the silt trap inside a removable bucket that’s easy to clean. The water then runs into the outlet pipe (usually a 110mm drainage pipe but other underground drainage pipes can also be used), leaving the silt and other substances behind. They pretty much function as a filter – this means that less debris is entering your system and that your soakaway (or attenuation system) can remain effective for longer or indefinitely.
Types of Silt Trap
While all silt traps serve basically the same purpose in keeping your soakaway system free of debris, different types are better for different soakaway systems. This is primarily to do with the size of the area covered by your system – the larger the area, the larger the silt trap you should use. Additionally, if you live in a coastal area or a place with heavy amounts of sand or silt, you may want to invest in a larger silt trap for the increased amount of debris you can expect.
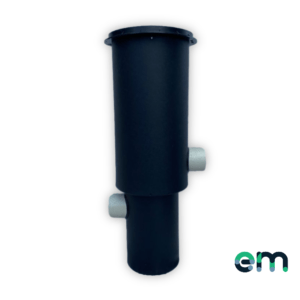
At EasyMerchant we sell a standard size which is suitable for most jobs. It’s 940mm high, 320mm wide and has outlets that are 110mm.
How to Install a Silt Trap
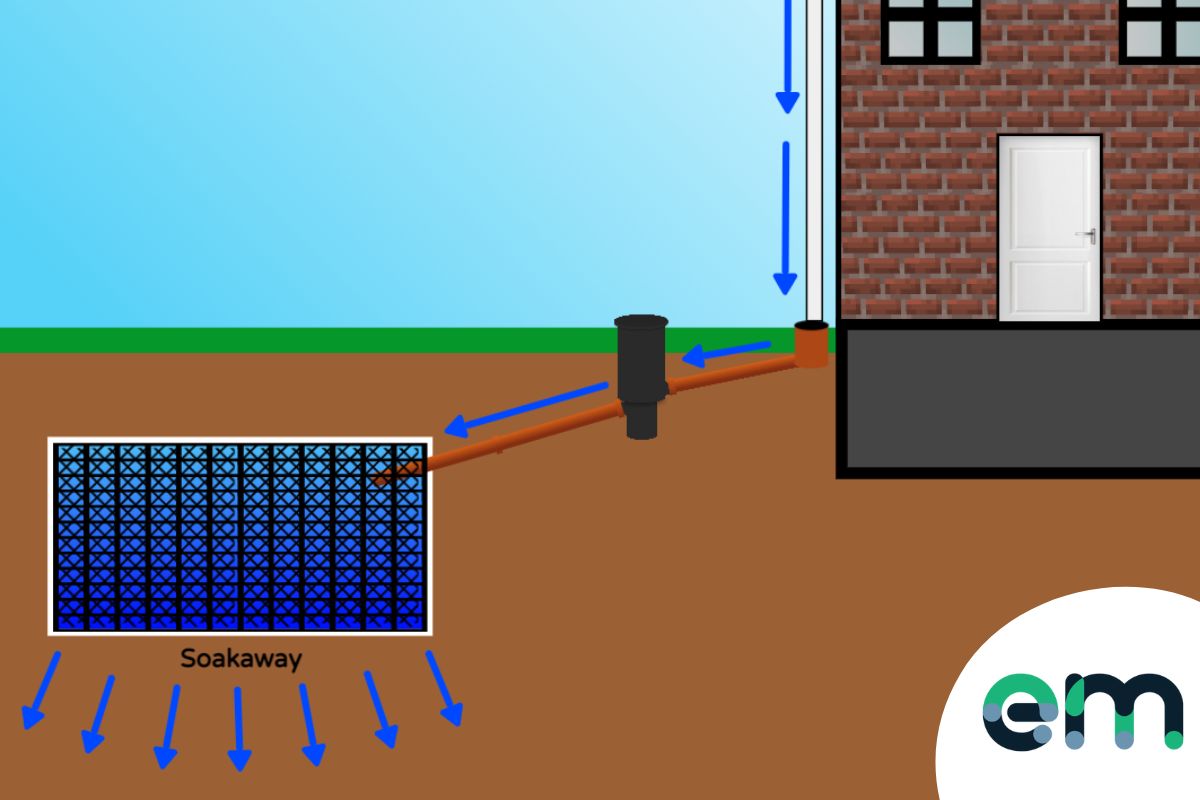
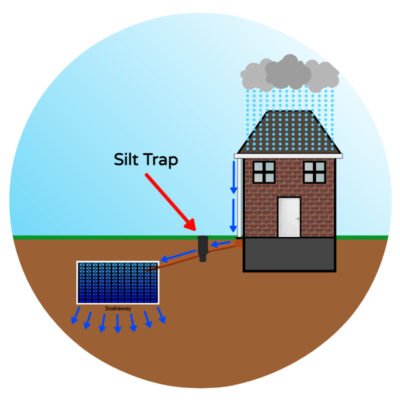
If you choose to install a silt trap, you just need to dig out a hole and place it upstream from your soakaway between the crates and the start of the drain, then connect it up to the pipes that are running the surface water underground. The silt trap should be higher than the soakaway crate to encourage the water to flow through it. The trap can be cut down and the lid reattached to suit the depth of the system, then it creates an access point for when you need to clean your silt trap by removing the silt bucket. We’ve put together a simple illustration below to show a typical set up.
Silt Trap Maintenance
When you’ve installed the silt trap it’s important to maintain it and by properly maintaining the silt trap it will ensure it is functioning correctly and keeping your soakway clean. Silt traps aren’t the kind of thing you can install and just forget about, though – they need regular maintenance or you may as well not even have one! You’d usually remove the lid and empty the silt bucket once every couple of months.
Maintaining the silt trap is easily done by removing the cover and then removing bucket/basket before removing the silt and then putting it back in place. You’re bound to be surprised by the amount of dirt and other muck that can build up in your silt trap – and that would have otherwise been wreaking havoc in your soakaway crate system. To clean out a larger silt trap, you may need to suck out the silt and other materials mechanically.
If you’re cleaning your silt bucket on a regular basis – two to three months should be enough – it will remain effective in preventing debris from reaching and damaging your soakaway. It’s a good idea to make this a part of your general home maintenance schedule, so stick it in your calendar!
Silt Trap Advice
If you’re looking to install a soakaway system on your property and want to extend its lifespan and improve its efficiency, you can contact us for advice via phone or email. Whether you have questions about how to install your system, or just what kind of silt trap unit would be right for your area, we can help.
At EasyMerchant, we sell a 320mm silt trap that we designed – so we’re confident that you can trust it! Made from durable and lightweight material, it can be modified to provide a minimum invert of 20cm, and you can also extend the height of the base silt trap with standard risers to suit your needs. While you can go to the trouble of building your own silt trap, going pre-made is much more straightforward, and we know that you’ll be happy with the result!
Silt Trap Infographic
Here’s an infographic we put together detailing what a silt trap is and what it does:
Shop Silt Traps:
(28)
From £228.03 Excl. VAT
Sale!
