No products in the basket.
Uncategorized
What Are Fascias and Soffits?

08
May
May
Fascia boards can be a fantastic addition to your home as they offer not only an aesthetically pleasing finish to the outside but they also work as a barrier between the elements and the edge of your roofing, helping to protect your roof and your interior from weather damage.
When it comes to fitting fascia boards, there are a few things that you need to consider to ensure that you achieve the finish that you are looking for. In this blog we aim to help you with choosing the right fascia boards and give you a guide on how to install new, cap or replace existing fascia.
When installing fascia boards, it is common to also install soffit boards to offer ventilation and a professional looking finish to your roofline. A soffit is easily installed at the same time as your fascia board to allow a good flow of air to keep your roofline in tip top condition. They cover any overhanging areas between the external wall and the exposed underside of the roof to offer additional protection of weather damage and a finished aesthetic. They do require ventilation to ensure that you do not gather condensation which will eventually cause timber decay. There are several ways of doing this, as explained below.
Which Soffit should I use?
When it comes to choosing the type of soffit that you require, the most important thing to think about is how it will be ventilated. The most commonly used type of soffit is a solid soffit combined with over fascia ventilation or circular soffit vents.
Another type of soffit that is available is vented soffit board which has pre-drilled ventilation holes. This allows the air to flow and keep the roofline in good condition.
If you have a wide soffit installation, Hollow Soffit Board is ideal as it is an economical choice that looks great when installed. and is wider than the other soffit boards as standard at 300mm. It is also lightweight making installation much easier.

Which fascia board should I use?
First things first, we need to have a look at the different types of fascia board on offer. Which type of fascia you require will depend on whether you are fitting new or fully replacing an existing fascia or whether you intend to cap the existing fascia on your property.
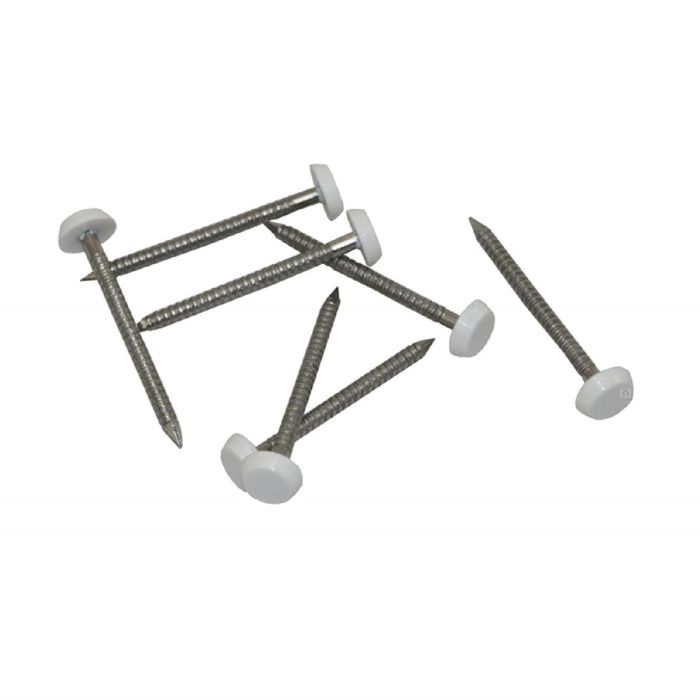
If you are fitting a new fascia or fully replacing an existing fascia, you will need what is commonly referred to as ‘replacement fascia’. This type of fascia board requires no backing board to fix to, it can be fitted directly to the rafter with Polytop Pins. You will find various thicknesses, 16mm to 25mm, available on the market as this can differ from manufacturer to manufacturer however the most commonly used size is 18mm Replacement Fascia. There are several different colour and effect options to choose from with the most popular being white, anthracite grey woodgrain and black woodgrain. You can then screw your gutter brackets directly into this board anywhere along its length.
Where you have an existing timber fascia that is sound and free of rot you may choose to use a fascia capping board to cover this to offer further protection and improve the overall look of the fascia. This can also be used as replacement fascia. However, as a standard capping board is usually 9-10mm in thickness, it will require a timber backing board and should not be fitted directly to a rafter as they are not strong enough alone to support the weight of your guttering.
When fitting your gutter brackets to the capping board, you must ensure that the screws go right through into the timber behind it for a secure fixing. As with a full replacement board, there are many colour options to choose from with the most popular again being white, anthracite grey woodgrain and black woodgrain.
On top of the two different types of fascia board above, you will also find that there are different styles of fascia board on the market. The style you choose depends completely on the aesthetic that you wish to achieve but the four main styles are bull nose, ogee, flat and square fascia boards.

Things to consider
- Ensure that you follow all Health and Safety guidance including ladder safety to avoid any accidents!
- Prior to installation, it is recommended to remove all guttering, downpipes and existing fascia boards to give you room to install the new boards without causing damage.
- We recommend that when replacing or fitting new fascia boards that you inspect the existing felt for deterioration. It is much easier to replace any damaged felt at this point than after fitting new fascia.
- Ensure that any timber is structurally sound with no rot to ensure that your new fascias will be securely fitted. Replace any rafters that are showing signs of rot.
- You may also wish to check that existing rafters are plumb and level to make sure that the new boards run with the roofline.
- If installing a vented soffit, you may wish to use a Soffit Vent Mesh to prevent insects and birds from getting in through the vents.
How to measure a fascia board
Once you have decided which fascia board you require, you will need to measure up the area you wish to cover. Follow the easy steps below to ensure that you have the correct measurements.
- Using a tape measure, measure from your first rafter to the last. If you are replacing just a section of fascia, measure the gap where you will be replacing the boards.
- Use a carpenter’s square to measure up against your fascia board and ensure that any cuts are straight with a 90° angle at the corner.
- Once cut, you are ready to install your fascia board!
Fascia and Soffit Installation:
Installation of fascia and soffit boards is a significant undertaking that not only boosts your home’s curb appeal but also plays a critical role in protecting it from the elements. This guide amalgamates expert advice to ensure your installation is both efficient and up to UK standards, focusing on uPVC fascia and soffit boards.
Preparation and Safety Measures:
Health and Safety:
Adherence to Health & Safety guidelines is paramount. Ensure you’re equipped with the correct safety gear and knowledge to prevent accidents.
Access:
Utilise a stable scaffold platform or a purpose-made cantilever deck system with guardrails for safe access to the work area.
Asbestos Caution:
If asbestos is suspected, consult your Local Authority for its safe removal by trained professionals.
Removal of Existing Structures:
Begin by dismantling old timber fascias, gutters, and downpipes. These materials can often be recycled; cut them into manageable pieces for easier disposal.
Roof Preparation:
Remove the first two layers of roof tiles as needed to inspect and possibly replace the existing felt with a new ventilation system and breathable membrane. It’s common for old felt to require replacement due to deterioration.
Pre-Installation Checks:
Structural Integrity:
Verify the rafters are sound, free from rot, and level. Rotten rafters should be replaced to ensure a stable base for your new uPVC fascias.
Rafter Spacing:
For new constructions, ensure rafters are spaced at a maximum of 600mm for white fascias and 400mm for foiled fascias, due to the latter’s higher heat absorption.
Soffit Bearers and Gable Framing: Similarly, soffit bearers should follow the spacing guidelines above, and adequate gable framing must be provided for securing bargeboards.
How to Fit Fascias and Soffits:
Soffit Board Installation:
Start with the soffit boards, fixing them at 600mm centres for White, and 400mm for Woodgrains and Colours using 40mm A4 Marine grade stainless steel plastic headed pins. Ensure a minimum of 10mm expansion gap between soffit joints using a soffit joint trim.


Fascia Board Fixing:
Choose the appropriate fascia board profile and fix it with 2 x 65mm A4 Marine grade stainless steel plastic headed nails, ensuring even spacing and alignment with the help of a low-tact tape guide. Remember to account for over fascia ventilation in your measurements.

Joint and Corner Treatment:
Use superglue and a matching plastic head pin for securing fascia joints, allowing for a 10mm expansion gap. For corner profiles, apply low modulus neutral cure silicone or superglue on one side to accommodate expansion and contraction.


Ventilation:
Install necessary ventilation directly atop the fascia board, choosing from a variety of options to ensure compliance with building regulations and to prevent condensation.

Rainwater System:
Attach gutter fascia brackets directly to the fascia board with 25mm stainless steel screws, following specific guidelines for your chosen guttering system.
Finishing Touches and Checklist:
Box End Construction: Precisely measure and construct box ends for a neat finish, ensuring the soffit overhangs by 10mm for a snug fit with the fascia board.
Completion Checklist: Before commencing, verify you have all necessary materials including boards, joints, corners, ventilation, and fixings to avoid interruptions.
Conclusion:
By following this detailed guide, you’ll be well-equipped to undertake the installation of fascia and soffit boards, ensuring a lasting and maintenance-free solution for your home’s exterior. This project not only requires meticulous preparation and attention to detail but also a steadfast commitment to safety and best practices as outlined in UK building regulations.
For further guidance, consider consulting additional resources or professionals to ensure your installation meets the highest standards of quality and durability.