No products in the basket.
Blog
All about Drain Testing
08
Jan
Jan
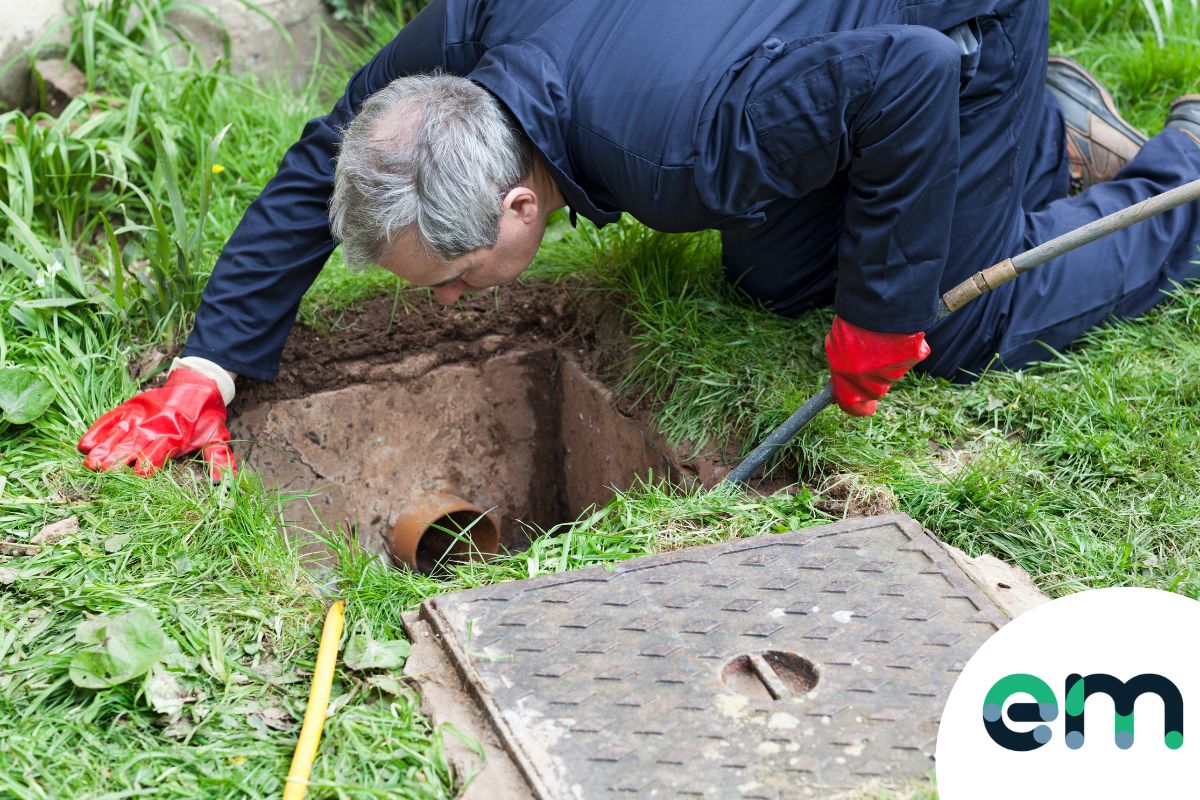
There are two main methods for a drain test; the air test and the water test. Other methods include smoke testing and the mandrel testing method. All of the tests are conducted to ensure that the newly installed plumbing system is free of leaks and is up to standard. This is important because each section of a plumbing and underground pipe system has a vital role to play in making sure the running water and overall system is in check. Multiple drain testing procedures will help to clarify if there are any leaks within a recently fitted system. The procedure of drain testing is vital to ensure a completed project falls in line with any standing regulations in the UK.
Usually you’ll perform a drain test before official inspection and then test again once in the presence of a building control officer.
Things to consider before carrying out drain tests (Drain testing procedure building control)
Before moving forward with a drain test all the pipelines should be examined for any upfront impairment or leakage. If the system that you are planning on testing are jointed systems, make sure to let them completely drain out for two days before starting any tests, so that any problems can be clarified.
Furthermore, before the drain test begins there will have to be a drain testing procedure building control officer there at the time. However it must be noted that it is best to ensure that the drainage has no immediate errors while flowing through the pipes, by running the system prior to having the officer observe the test.
What is smoke testing?
Officially, smoke testing would not count as a genuine examination of a drainage system’s ability to function correctly in terms of water tightness. However it is useful to use with uPVC piping to establish leaks and other faults that may not have shown up during a water or air test.
It is important to check with manufacturers before going ahead with this test because it could damage certain types of pipes.
What is mandrel testing?
Mandrel testing is used to gauge the quality of an installation. It is a small object that is sent through the interior of the pipe to assess that the consistency of diameter throughout the pipe is adequate. They have a smaller diameter in comparison to the pipe itself, so for example if the pipe was 150mm you would look to use a 135mm mandrel. They can be identified as a cylinder like object.

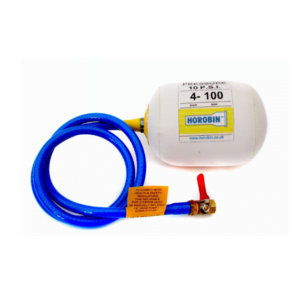
How does a drainage air test work?
Air testing is a fast and efficient way to ensure both single pipes and drain runs are working the way they should be. This happens through a specific part of the drain being sectioned off with two separate gauges with the pressure set to 110mm head for five minutes, both of these gauges will give a pressure reading. After this the head is adjusted to a 100mm head for five minutes. Any noticeable changes in the pressure will be measured. This method works as an accurate measure to see whether there are any problems but cannot be used on all kinds of drains and systems, as it relies on the drain being able to be blocked at both ends and is extremely sensitive to temperature change. For example, a reduction in temperature of just 1 degree inside the pipe can be enough of a drop for the test to fail.
Drain testing procedure for an air test
To begin with, fit a bung at the head of the pipe run with the correct nipple cap to attach it to the hose that will be connected to the manometer. Make sure that your manometer has been partially topped up with water prior to this.
After this, use a hand pump to increase the pressure until the manometer reads between 125-150mm. After this is completed it’s important to leave the equipment for 10 minutes in order to let the everything settle before reducing the manometer’s pressure to 100mm.
Next, the manometer must be monitored for five minutes and within this time it must not drop below 75mm. This will be considered a pass, however if it does reduce to below the 75mm line on the manometer there should be an examination for leaks and other signs of failure. If anything needs rectifying this must be complete before conducting another test and if this fails move to a water test.

How does the drainage water test work?
Water testing, also known as water drop testing, is a method of testing drains which requires less pressure but, unlike the air test, may take up to 2 hours to set up. The test itself works through bunging up the two ends of a system, charging the system with water and overseeing the water levels either at a manhole or access point. No additional pressure should be applied when performing the water test. This means that the water level should be limited to 1.5 meters from the lowest invert level of the drain being tested. This method has the positive of being able to test a whole system at once which can be beneficial for everyone involved in the process.
Drain testing procedure for a water test.
There are two types of test parameters that must be followed, depending on the size of the pipe you will be using. If the pipe diameter is in the range of 100-400mm then the rules for BS8301 should be followed. This means a 1500mm head at the high end and a maximum head of 400mm at the low end. If your pipe is between the ranges of 400-750mm then the rules for BS8005 should be followed. This means a 1200mm head at the high end and a maximum head of 6000mm at the low end.
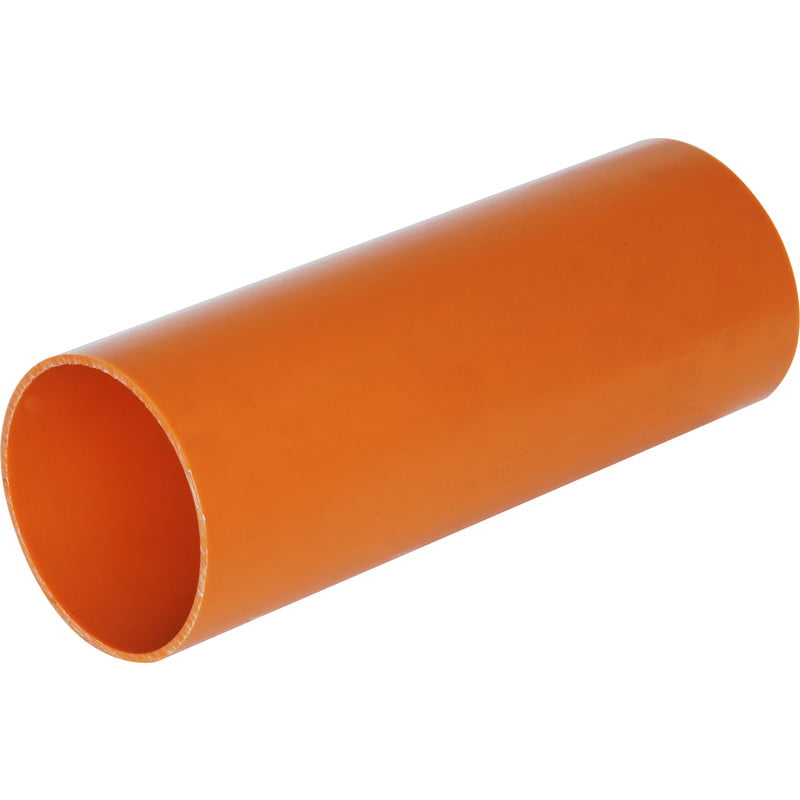
Firstly the lower end and all open branches must have bungs put into them, after this a 90 degree bend must be added to the top part of the run with a vertical pipe of the same diameter also added. In order to carry this out correctly the vertical pipe will need to be tied up to a secure object like a fixed wooden post.
After this, add water to the required head level in the vertical pipe based on which rules you are following (BS8301 or BS8005). Proceed to let the water stand for two hours before topping it up to the essential level stated on the guidelines specific to the sizes you may have.
Moving forward be sure to monitor the process for half an hour and make sure to keep the water head filled up as necessary, while recording the quantity of water that you are adding. After the half an hour has come to its end, the amount of water added must be calculated by figuring out the maximum permissible loss, which is; one litre every hour of water, per meter of pipeline, for every meter of inside pipe diameter. An example of how this may look when applied to a job may look something like this, 1L/hour x 100m x 0.20mm.

Making repairs
It is not uncommon for the need to undertake repairs after running a drainage test. Often, it may be a case of a faulty length of drainage pipe or a joint that may need re-doing. However, if there is no obvious fault it may require disassembly of the system entirely and individually testing each section using an air test. After the fault is correctly identified, tests must then be rerun to ensure everything runs as it should. It may be that there is a need for a new length of pipe or the need to re-join or reseal parts of the system.
When it comes to manhole covers and inspection chambers, it is common for joints to leak but is usually an easy fix through the process of re-joining and resealing. However it may be a structural problem with the base and the concrete with the sealing of the pipe. If this is the problem and epoxy mortar doesn’t fix it, the only option is to completely rebuild, which is not ideal but necessary in accordance with regulations. Once again always retest after attempting to rectify any faults within the system.
How to water test a manhole and inspection chamber.
The process does not differ far from that of the regular water test. Firstly all of the ends of any open ended outlets etc must be bunged up and then the manhole chamber must be filled with 300mm of water.
After this wait a minimum of an hour and no more than 2 hours, before visually monitoring the water inside the chamber for half an hour. In most cases water loss of below 25mm over the course of 10 minutes is classed as a pass but if you are unsure you can use the same calculation as with the pipes to find this out.


What are classed as acceptable leakage rates for the drainage water test? (Litres in 10 minutes)
110mm Diameter Pipe, 0.2l per 5-10m, 0.4l per 10-20m, 0.6l per 20-30m
160mm Diameter Pipe, 0.3l per 5-10m, 0.6l per 10-20m, 0.9l per 20-30m
200mm Diameter Pipe, 0.4l per 5-10m, 0.8l per 10-20m, 1.3l per 20-30m
225mm Diameter Pipe, 0.5l per 5-10m, 0.9l per 10-20m, 1.4l per 20-30m
What happens with drains less than five meters long?
If your length of drainage is below five meters it would be a case of using common sense to assess whether the leakage is acceptable or not. A good rule of thumb to go by is if there is damage to the place where you are undertaking the test then it is not a good sign and there is probably more water than there should be. On the whole it is common knowledge that an amount less than 25mm in ten minutes is not deemed enough to be a concern.
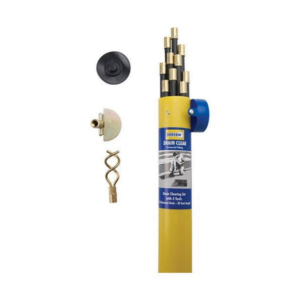
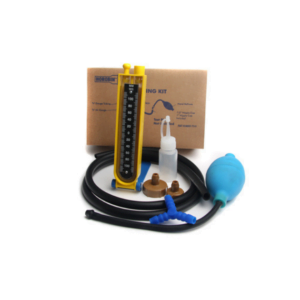
What’s in a drain testing kit?
At EasyMerchant we offer both an air testing kit and drain testing kit to suit the requirements for your job. The drain testing kit essentially includes the basics required to test a drainage set up:
- Air tubing
- ‘u’ air gauge (manometer)
- Y-piece
- 4″ plugs/bungs and a ½” brass nipple
- Hand bellow

Drain testing bags
Drain testing bags are used in a variety of industries such as Sewerage, Petrochemicals, Food Processing, Mining etc. The reason for this is due to their adaptability and ideal use in places with a smaller area than the test diameter. The smaller sizes tend to be fitted with Schrader valves, or brass air traps and bigger ones are fitted with ball valves for inflating using a compressor. If necessary it can also be fitted with a pressure gauge to prevent over inflation.

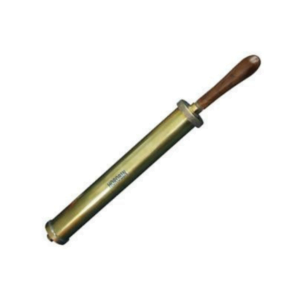
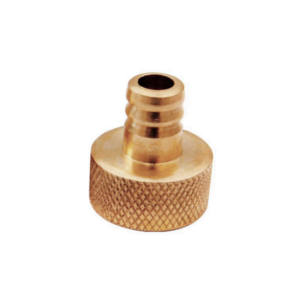
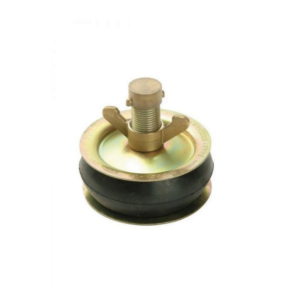
Drain testing bungs
In order to correctly test any pipework using either the air test or water test, the use of expanding bungs are an absolute necessity and one of the most important pieces of equipment. The drain testing bungs themselves have a metal outside which pushes together the rubber inner core (which expands to block off the pipe), the mid section is a hollow rod and has a nut that fits on top of the of the rod and is used in order to adjust the compression of the device. If you can’t connect this bung to a manometer you can fit a nipple to the end of it, and if this does not work, an end cap will create a secure seal.
The sizes of which the bungs are available in vary depending on the size of the pipe needed for the job at hand. To fit a bung to a 110mm drainage pipe, the 100mm (4 inch) bung would be required. If, for example, you need to use 225mm pipe then a 150mm (6 inch) bung would be required. At least two bungs will be needed depending on the property and pipeline you are testing, one to block off each end.
Before attempting to fit the bungs for pressure testing ensure there are no issues or dirt that could prevent the installation and function of the bung, as any grit or dirt within the seal could allow leaking and thus fail a test.
When applying the rubber bung, it is opened out to make the diameter of the rubber section small before being put into the pipe. After this it is tightened in order to expand once again and create a strong seal that presses against the inner pipe forming a wall which means the pressure gauges will give an accurate reading of the test drain.
At EasyMerchant we stock the equipment required to undertake a drain test and also have good knowledge of the process and how it works so feel free to get in contact if you have any queries.

Shop Drain Testing:

Out of stock
Out of stock
Out of stock
Out of stock
Out of stock
Out of stock
This is amazingly good