No products in the basket.
Blog
Choosing a Herringbone Drainage System
01
Jun
Jun
A properly installed land drainage system is the perfect solution for any areas of grass that are prone to becoming waterlogged, regardless of whether they are in a domestic, commercial, industrial or agricultural setting. This can be a particularly troublesome and frequent problem in the UK where we experience a fair amount of rainfall every year (even during the warmer summer months). and for areas that have dense, clay soil or are located near to large bodies of water. Unfortunately, waterlogging can be both timely and costly to deal with as it can significantly damage landscaped areas, gardens, plants, and even nearby building foundations, however with a well designed land drainage solution, you can avoid the issue altogether. As well as being an incredibly effective way to avoid flooding, standing water, and water damage to properties, lawns and fields, land drain systems are also fairly inexpensive (particularly when compared to the repair costs for ongoing flood damage) and straightforward to install.
As with most solutions, there are a number of different approaches that you can take when it comes to installing a land drain solution, however the classic herringbone design remains to be one of the most popular options. This is due to a variety of reasons which we cover here, along with a brief overview of the alternative land drain solutions that you may wish to consider where surface water is a problem. In this post we also provide a brief overview of how land drains tackle drainage problems, and we share some practical tips and information on how to install a tried and tested herringbone drainage system.
How Land Drains Work
Land drains are perforated pipes made from robust PVC that are installed into prepared trenches across a chosen area of ground where rainwater collection is a problem. Secured between both a cover layer and a bedding layer of a suitable aggregate – such as stone chipping or gravel – excess rain water is able to slowly seep into the pipes through the perforations, and providing that the pipes are installed at a sloping gradient, the collected water is then able to flow through to allocated disposal points such as a storm drain, a soakaway crates system, or a permitted natural water source such as a nearby river or lake.
Land drains have been relied on as a tried and tested method of water removal since the 19th century, and the method is sometimes referred to as a French drainage system in recognition of the American farmer – Henry Flagg French – who first popularised it. Back then, simple roofing tiles were used to create the drains, however today all land draining piping is made from strong and durable PVC which is not prone to water erosion and is available in a wide range of lengths and diameters. Depending on the application, either land drain coils or twin wall land drains are used – the former is very flexible so it can be easier to transport and install, whereas the latter offers additional strength which may be required for any drainage pipe installations that are located underneath heavy items or traffic, such as highways, railways and airports.
Drainage System Options
Although all pipe drainage systems work in a very similar way, there are different layout designs that can be applied depending on the shape and area type that needs to be drained. Below, we’ve outlined the top four patterns that are most commonly used:
Herringbone System
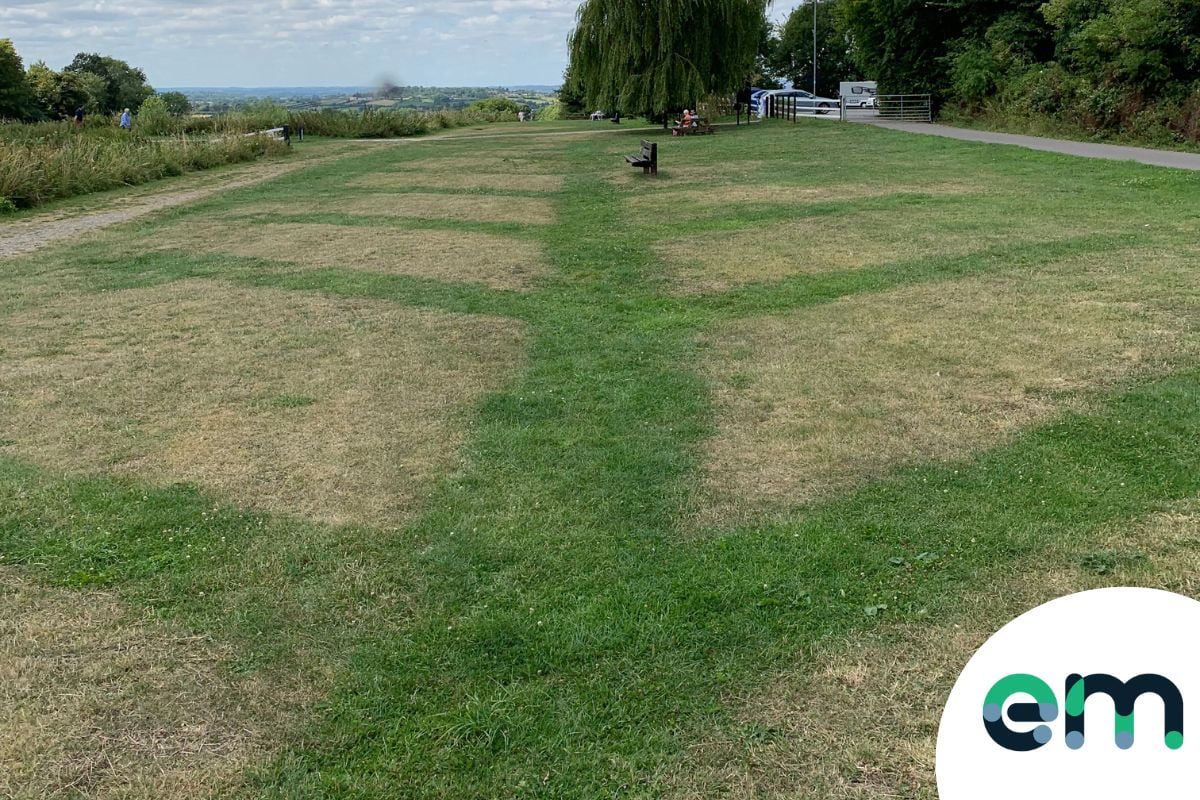
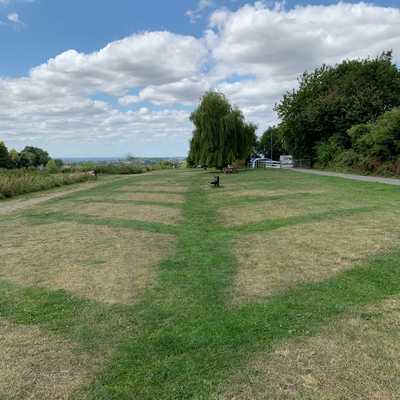
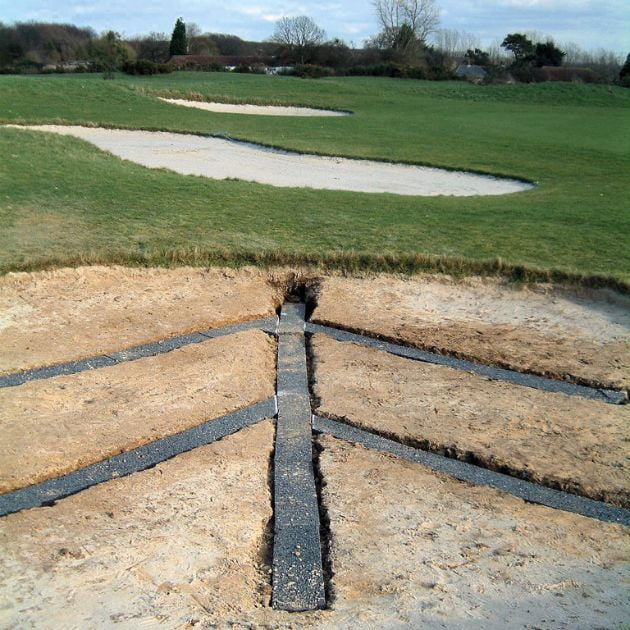
When creating a herringbone drainage system, a main central pipe is installed on a downward slope and then several lateral pipes are connected to the main pipe at slight angles. The resulting pattern is similar to the bone structure of a herring fish, hence the name, and is most commonly seen across wooden flooring and textiles.
Rather than just relying on a single trench, this application method creates several trenches that all slope down towards the main pipe for effective drainage to ensure that all areas across a stretch of grass – such as garden lawns, football/rugby pitches, or parks – are fairly close to a drain.
The herringbone pattern is most commonly used in larger areas such as sports fields and golf greens, as well as domestic and commercial lawn areas that have a fairly irregular shape.
Grid System
Also sometimes referred to as either a gridiron or a parallel drainage system, the grid system is made up of at least one main pipe that runs along the perimeter of a specific area that needs drainage support, with lateral pipes running across the area and connecting to the main pipe at right angles or acute angles. The grid pattern can be best suited for areas with uniform, geometric shapes – such as football pitches, rugby grounds, and bowling greens – and is most commonly found in turfed areas largely because it can be easier to install. Sand or gravel slits can also be added to a gridiron or parallel drainage system with minimal disruption to playing fields to further support the process of removing unwanted water.
Fan System
Fan systems are often used in very small gardens, low lying wet areas, or non-standard shaped patches of lawn. This can include golf fairways, however for larger areas such as a golf green, the herringbone pattern is much more suitable. To achieve the fan drainage system pattern, a number of lateral pipes need to be evenly spread out – or fanned out – and each one should be connected directly to an outlet.
Natural System
Sometimes also referred to as a contour or simply a random drainage system, the natural drainage system pattern follows the contours of the ground that it is installed under, with the piping laid in a pattern that echoes the natural curves of the land. This system is best suited for what is usually described as amenity grasslands, which refers to areas that are regularly maintained, such as sports grounds, village or suburban greens, and closely mown grass in parks.
Pros and Cons of the Herringbone Pattern
While the herringbone pattern can be a little more expensive to install due to the amount of piping that it requires, it remains to be a very popular choice. This is partly because the excavated drains for a herringbone system don’t need to be as deep when compared to the other options, which can save a significant amount of time, however an even greater advantage of the herringbone pattern is the overall efficiency of the design. The pattern makes it easier to ensure decent drain coverage across areas of land, as it is generally recommended that any lawn or turf areas that need to be drained should not be further than 2.5m away from a section of pipe.
One of the main disadvantages of the herringbone pattern is that it can be trickier to install than the other land drainage design types, however this can be negated with a clear and accurate plan.
Installation Advice
The process of installing land drains is fairly similar regardless of which of the pattern types that you opt for, and only requires a relatively small number of items and tools to achieve very effective results. Required items include perforated land drainage pipe coils, land drain coupler, land drain multi junctions, a saw to cut lengths of pipe as needed, suitable gravel, topsoil, lengths of non woven geotextile membrane, and any digging equipment you need to dig deep enough trenches. Although the installation may differ slightly depending on the method and equipment that you are using, generally it involves the six key stages that we have briefly outlined below:
Planning and Preparation
It is advised that you put together a visual plan before you begin creating any type of drainage system to ensure that you have enough land drain pipes for the applicable area and a clear idea of what lengths you need and where each trench needs to be installed. A drainage plan does not usually need to be overly detailed, but it can act as a very helpful guide to refer back to throughout the installation process.
Before you get started, depending on the application that you’re dealing with, you may also need to check with the relevant local authority with regards to the disposal point for any excessive rainwater that your drainage system will collect, as councils usually have ownership of storm drains. If you are planning on directing collected rain water to a local river, stream or lake instead of a soakaway system, you may also need to obtain permission from the Environment Agency.
Trench Digging
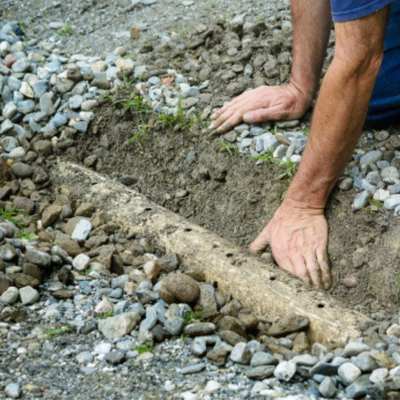
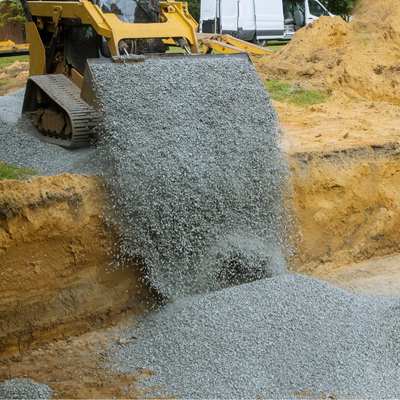
In addition to allowing space for your chosen land drains to properly fit, the trenches you dig must also allow for enough aggregate to be installed underneath, above, and on either side of the pipes. Experts recommend that you allow for 15cm of gravel backfill at each side of your pipes, a minimum of 45cm depth of cover (which is usually 15cm of topsoil along with a 30cm drainage layer) and around 10cm of gravel at the base of each trench. The depth can also be adjusted depending on the soil type and size of your land drain pipes, however it is advised that trenches that are deeper than 120cm are shored – which is the process of bracing the walls of the trenches – otherwise they could run the risk of collapsing.

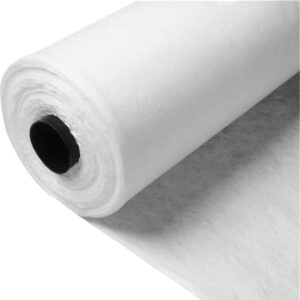
Laying Geotextile
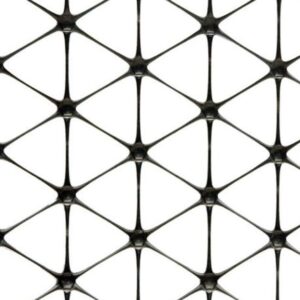
In order to protect your land drain system from a gradual build up of sediment, you can either use a catch-pit or install a non-woven geotextile around your land drains to increase the longevity of the overall system. By acting as a lightweight separator, the geotextile will allow water to pass through into the pipe system while also preventing soil, stones, sand, and other materials from finding their way into the drains and causing problematic blockages. Geotextile membrane can also be used to wrap around soakaways where required, and many can be ordered in a custom size to ensure that you are not wasting money on excess material that you do not need.
To install geotextile, you should cut the right size of membrane to generously line the bottom and sides of the trenches, as well as enough to fold over and cover the top of the trench once it has been filled with the drain pipes and final layer of gravel and topsoil.

Laying Drains
Once you have dug the trenches in a herringbone layout and laid in the initial sheets of geotextile to cover the bottom and sides, you can then create a gravel backfill that is around 10cm deep at the bottom of each trench. Next, you can carefully add in the drains, and use professional coil connectors to join lengths of pipes together, as well as multi-junctions to properly connect the lateral pipes to the main pipes in the herringbone pattern. You must also ensure that the pipes are installed at a suitable gradient to ensure that the rainwater collected by your system flows freely to the designated disposal points. It is recommended that you opt for a gradient of around 1 in 150 for a stable and gradual flow for your land drains as a higher pipe fall could cause the water to flow too aggressively, which can lead to flooding issues. Also, a common mistake when laying land drains is to place the pipes the wrong way around – for drains that only have perforations on one half of the piping rather than all around it, the perforations should be installed facing downwards rather than upwards.
It’s also worth noting that when cutting lengths of pipe, you should ensure that the cuts are made in between the corrugations of the piping.
Adding in Backfill
Adding in gravel is important as it enables excess rain water to gradually flow into the land drain pipes. As such, we recommend that you fill up your trenches with at least a 30cm layer of gravel and leave a space of around 15cm from the surface.
There are lots of different types and sizes of gravel available, however for drainage purposes a small size is usually best and some professionals recommend using a crushed stone. It is also best to avoid using decorative gravels for any drainage projects, as they are likely to become too compact and trap pockets of water.
Covering Land Drains
Once your drains and a suitable layer of aggregate are in place, you can cover the top of your trenches with the final layer of geotextile membrane. Next, you simply need to fill in the trenches with a layer of top soil, usually 10-15cm deep, and then finish with grass to complete the project.
Drainage Planks.
A new system to the market that can be used for a herringbone drainage system are the Enviroflow drainage planks. They are a 100% recycled product that is easy to install and never clogs. They’re basically 1m long sections that can simply be installed within a trench and covered back over. This can be a very simply and easy to install solution that is perfect for smaller projects. One major benefit is that it doesn’t dry like pipework does, so it doesn’t leave the lines in the grass once it’s dried out.
Specialist Drainage Products
Whatever type of land drain system you are looking to install, you need to ensure that you use commercial grade products to create a long-lasting solution to tackle lawn drainage issues. At EasyMerchant we can provide you with all of the necessary underground drainage supplies, and our land drainage pipe and coil products are relied on by domestic customers as well as trade merchants because they are very flexible, tough and easy to install. We also provide other garden drainage solutions, such as channel drain products, which can be installed at the edge of patio or landscaped garden areas to prevent water pooling and other types of drainage problems.
To ensure that the products we offer are of the highest quality, all of the ranges stocked via our online store are produced by leading manufacturers, with many featuring the British Kitemark. With our speedy delivery service, any items you order from us will be shipped within 1-3 business days, and our knowledgeable Customer Service team is available if you have any questions about which products you should use for your commercial or garden drainage system.
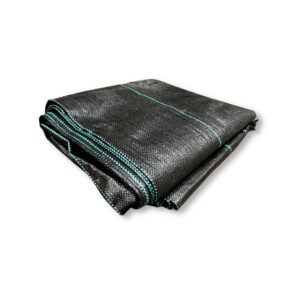
Shop Land drainage and Geotextile membrane:
Good Morning
could you please provide a quote for a non woven and woven membrane and drainage for a 60 x 30 m school, for delivery to DN40 3JQ. please price separetely
many thanks
Yvonne
Hi Yvonne,
Give our friendly customer services team a call on 01371 850120 option 1 or drop us a line by email at sales@easymerchant.co.uk and we will happily put you a quote together for you!
Thanks
Lainey