No products in the basket.
Blog
How to Connect Underground Drainage Pipes
01
Feb
Feb
How to Connect Underground Drainage Pipes
An underground drainage system is obviously an important part of any property, be it residential or commercial. All buildings in the UK must be connected to a suitable drainage system, which prevents damage to the property and local environment.
The most commonly installed type of underground drainage pipe in the UK are PVC pipes, which usually feature a push fit connection, which means that to connect them they’re simply pushed together and do not need solvent cement or any large tools.
In this blog post we’ll go over how to properly connect underground drainage pipes as well as any tools and other considerations before you go ahead.
Plan the drainage system:
Before you start connecting up your pipes, it’s important to properly plan the system out to avoid having to redo any work later on. Usually, an architect or drainage engineer will have some drawing plans, but otherwise you’ll need to make a sketch of the intended system including the location of the pipes, the direction they are to run and where they will connect to the mains system. You should choose the correct size (diameter of pipe) depending on the flow of water that will flow through them. It’s usually 110mm for domestic homes and 160mm drainage pipe for the main run that would connect several houses together. It’s also a good idea to have a full list of parts including any bends you’ll need, angles, joiners, junctions, gullies – etc. Also, before you start digging your trenches, it’s a good idea to lay out the pipework taking into account any objects that may get in the way such as trees, paths, building, other pipework in a way that avoids the need for sharp or unnecessary turns. You’ll also need to figure out the correct “fall” for the pipework – this is the gradual gradient that is required to allow gravity to move the water through the pipes. For more information on how to do this please see our “Underground Drainage Installation, the basics.” blog post.
Ready your tools:
In order to properly connect your pipes you’ll need a few basic tools at the ready such as:
- A hacksaw or a fine-toothed saw
- A measuring tape
- A marker or a pencil
- A rubber mallet
- A chamfering tool
- A trenching shovel
Your materials:
- Underground drainage pipes (in the size you have chosen)
- Any fittings required such as bends, couplers, end caps, junctions etc
- Pipe lubricant
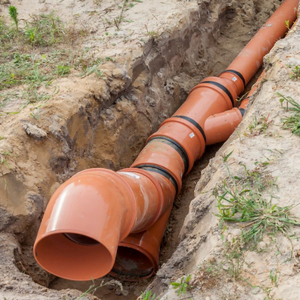
Dig your trench:
Dig a trench that is at least 410mm wide (for 110mm underground pipes) lined with pea shingle making sure to add at least 300mm of cover over the top of the pipe once it’s in the trench.
Cutting and chamfering the pipes to length:
Once your tools and materials are ready and your trench is dug you can start measuring and cutting the pipes to length. Using your measuring tape, mark and cut each length of pipe required and then saw it to the correct size using a clean straight cut. Next properly chamfer the end of the pipe using a chamfer tool or a file and then clean the end to remove any debris from cutting. This will make it easier to join the pipes as well as making sure that the seals do not get damaged and lead to any leaks.

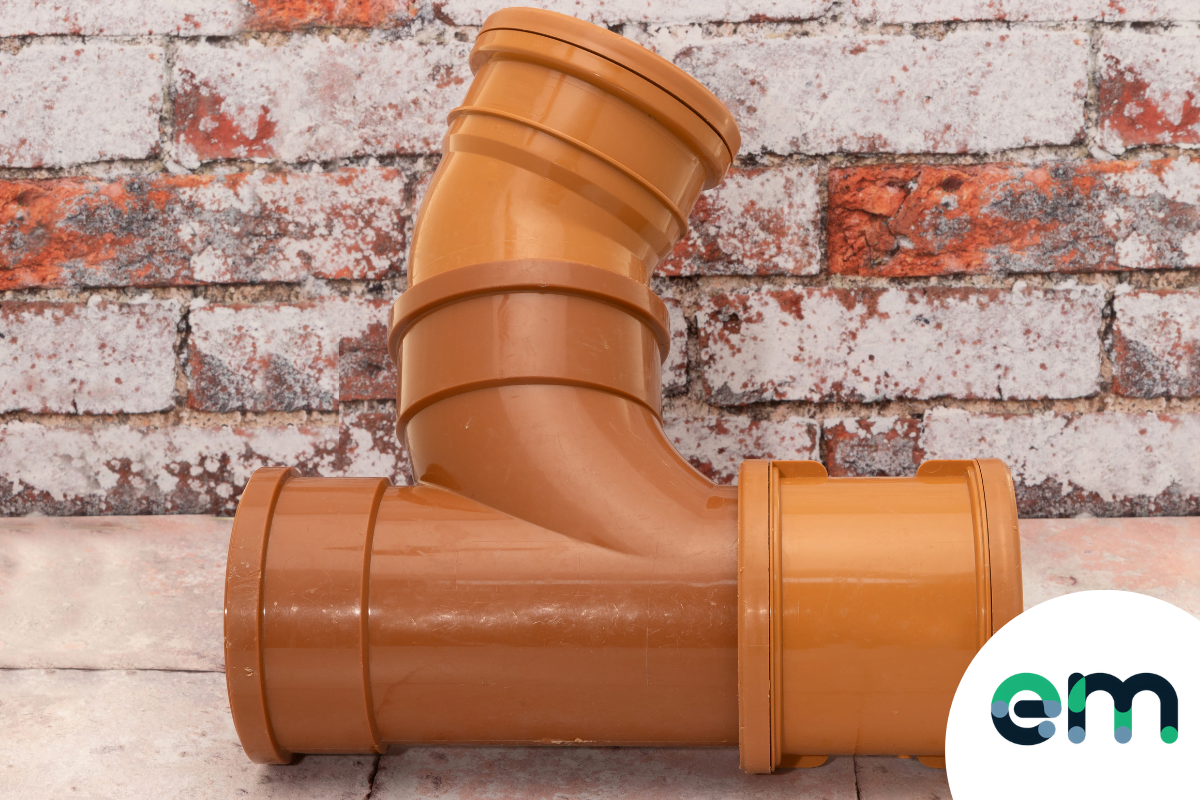
Connect the Pipes:
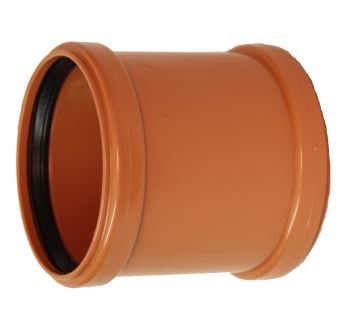
Now for the fun part, connecting up the pipes. To join two length of pipes you’ll either need a drainage pipe coupler which is a small pipe fitting with two sockets (the sockets are the female ends that will accept the plain end / spigot [the male end] of a pipe or fitting), or you’ll have a socket that comes on the end of the pipe or fitting. So in short, the male end (spigot, or end of the pipe) of the pipe or fitting fits into the female end (the socket) of a pipe or fitting.
To connect them, simply add some pipe lubricant both to the rubber seal of the coupler or socket as well as to the chamfered end of the cut pipe or spigot, then push the pipe into the socket all the way to the locator within the fitting. If it is stiff you can use a rubber mallet to tap it into place.
Continue this method for each length of pipe and for each fitting within the system.
Test Your Drainage System:
The last step is to test the system for any leaks before you fill the trenches. This can be done by an air or water test to check for any leaks. If leaks are detected, check the connections and tighten them if necessary. If tightening them doesn’t work then take the joint apart and check the rubber seal for any damages or dirt / grit which may have stopped it from sealing properly.
Once tested and functioning correctly you are done! It’s time to fill the trenches and move on to the next job!
So overall, connecting PVC underground drainage pipes is a fairly straightforward process. With the right tools and materials, you can get the job done quickly and easily. If you require any further information please feel free to give us a call!
When using single socket pipe pipes does the male chamfered end have to fit into the socketed pipe end in a ‘downhill’ fashion or doesn’t it matter
Very good