No products in the basket.
Blog
How to Install Channel Drainage
05
Jan
Jan
If you’re looking to prevent standing water on a large paved, tarmacked or concrete area you may be considering installing channel drains (also known as linear drainage or drainage channels) to connect to an underground drainage pipe. Channel drainage is legal requirement for most driveways over 5m2 and they’re a cost effective and easy to install option.
A drain channel provides a neat, tidy and fairly simple channel solution – but unless it’s installed properly, you might not get the result you were hoping for – and, if you’re not careful, you can sometimes end up just moving your underground channel water problem somewhere else. As such, we’ve put a guide together that goes into detail about:
- What drain channels are and some typical uses
- The different components in a typical installation
- The 11-step process of installation
- Some important dos and don’ts
What are channel drains?
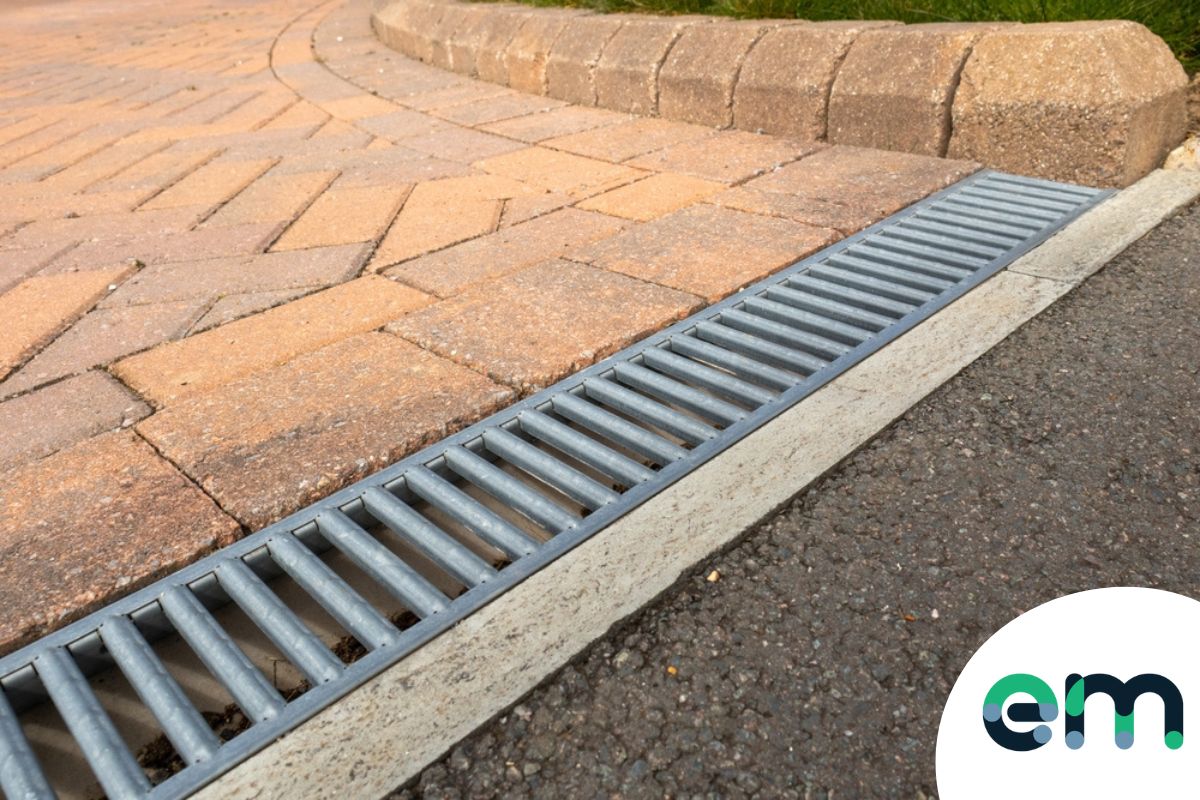
Channel drains are occasionally referred to as linear or Aco drains – and the chances are, you’ve probably walked or driven over numerous channel drains in the last 24 hours. They are a completely unobtrusive, neat and tidy underground drainage channel drain solution that’s used everywhere from the smallest internal domestic settings, right up to large scale industrial locations.
Despite a neat and tidy presentation, a channel drain will move large quantities of liquid. Sections of channel drains are much longer than they are wide, giving enormous volume – and have a cross-section design that contains the flow from the surrounding surfaces.
Black Plastic channels or composite channel drain options are the most commonly installed. Grate covers can also be either plastic or composite, occasionally cast iron or stainless steel – and sometimes one-piece formed to increase strength.
A domestic channel drain usually has a load capacity of 5 tonnes – with a 1.25 tonne point load, making it ideal for driveways, paving and patio areas. Commercial channel drainage often has a greater load capacity, making it suitable for even the most testing industrial setting, in fact, it is even often used to keep commercial runways clear of standing liquids.
How to connect channel drainage to an underground drainage pipe system?
There tends to be two main ways of connecting a channel drain to an underground drainage pipe.
There are actually three outlets in each length of channel drain – assuming the underground drainage you’re connecting to is at a lower level than the channel drains, you should use one of these outlets. They cut out quickly and easily and a section of 110mm drainage pipe will push fit into place.
Alternatively, you could use an end outlet – which adapts the end of the channel drainage- pushing into place and being held by the surrounding concrete. An end outlet is ideal if your main underground drainage system is located at either end of the channel drainage.
Typical uses:
Drainage channels are suitable for an enormous range of settings.
Black domestic drainage channels are commonly used to connect to underground drainage from driveways, patio areas, pavements and conservatories – and sometimes in wet rooms, kitchens and garages.
Commercial channel drainage appears in countless settings, particularly because of its increased load tolerance – making it ideal for areas that see heavy footfall or traffic, such as building entrances, pedestrian precincts, car parks and railway platforms. The large load capacity also makes it a viable option for swimming pools, parks, fountains and outdoor sports areas too.
Channel drainage components and options:
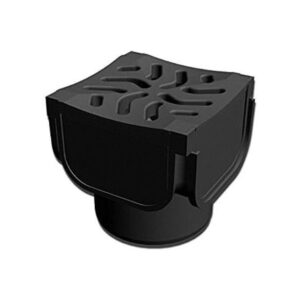
There are typically 6 components that feature in a standard installation, they are:
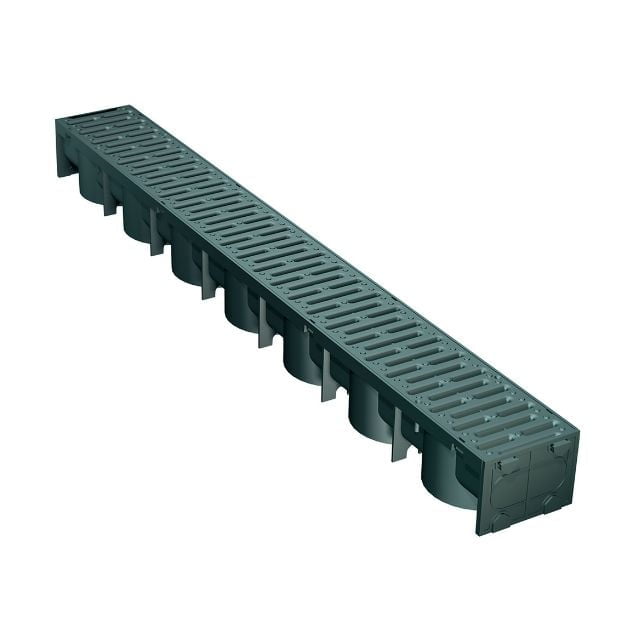
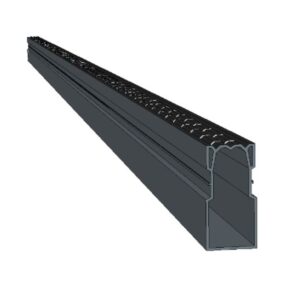
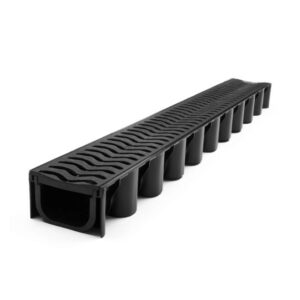
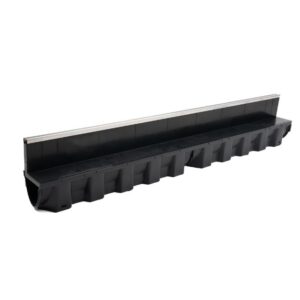
- Drainage channel sections: The main part of the drainage channel installation, usually supplied in 1m lengths and coming with slotted ends, allowing for quick locking together of sections. Each section will have an outlet in the base that allows for downward drainage into a 110mm sewer connection.
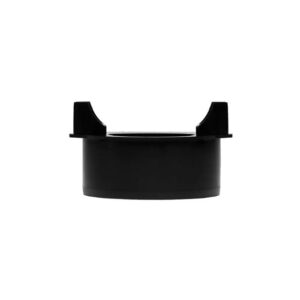
- End outlets: An end outlet allows a channel drain section to be connected to a standard (usually 110mm) underground system at the end of the run, rather than the bottom.
- Grating: Usually made of PVC, composite or stainless steel, the grating sits virtually flush to the surrounding area, providing a non-slip surface for overhead traffic but adequate access to the channel drains below.
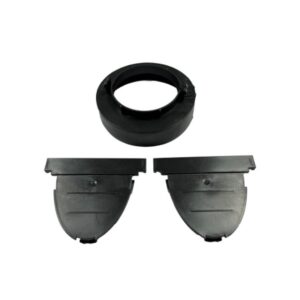
- End caps: End caps allow you to put a tight seal on the highest end of the installation or specific run.
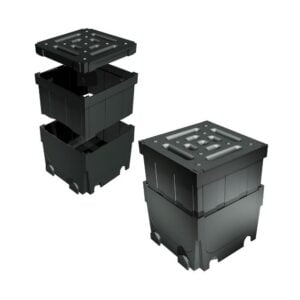
- Quad sections: A quad section allows for up to 4 standard sections to be connected at 90-degree angles, allowing the installation to work around corners – or meet another section at a T-junction.
- Sump units: A sump is optional – but offers a silt basket that helps to prevent blockages – and usually includes a trap that’ll prevent any odour relating to standing water.
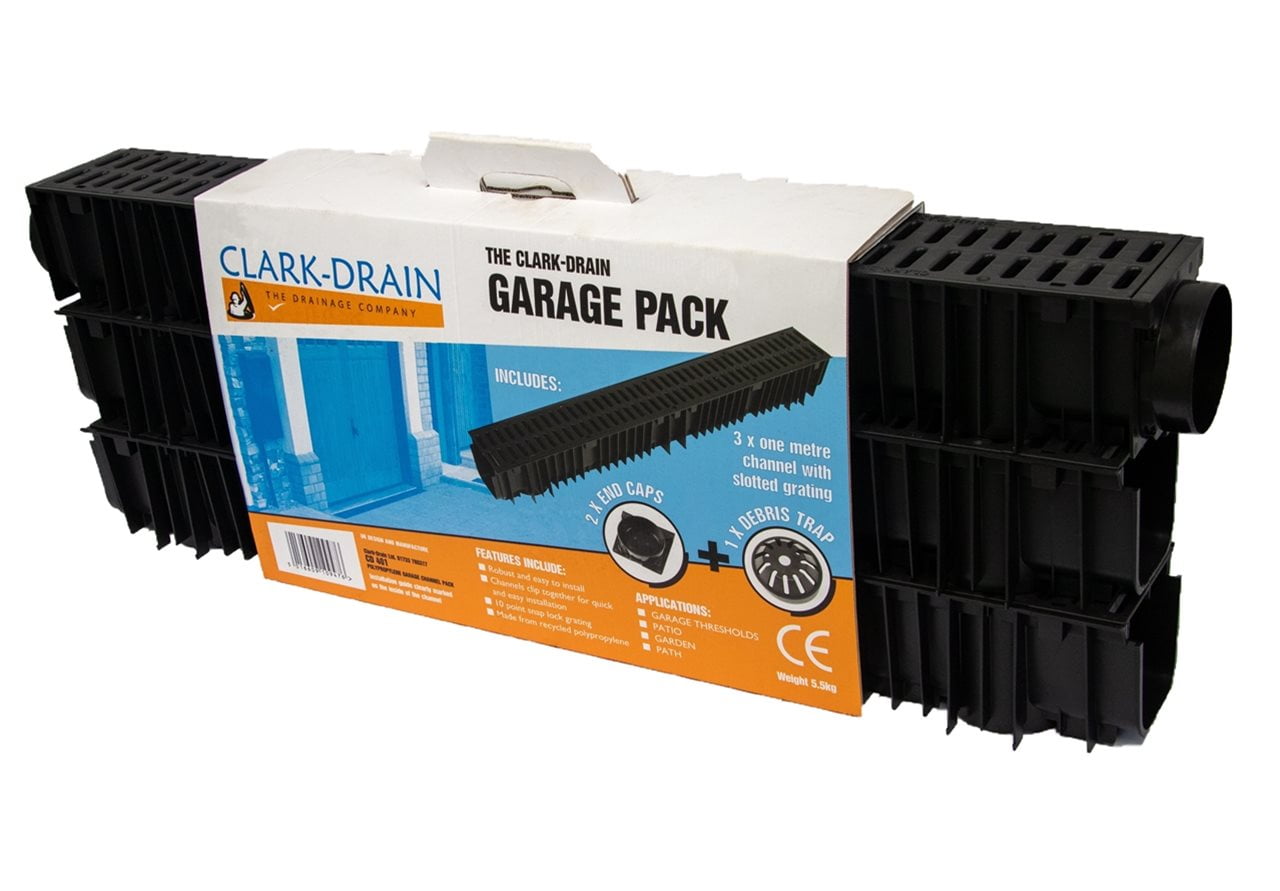
Components are typically bought individually, although some manufacturers, such as Clark Drain, offer garage packs – a kit that usually contains 3 x 1m channel drain, an end cap and an end outlet.
How to install driveway drainage channel – installation Guide:
We’ve broken the installation of domestic drain channel down into 11 steps – with some detail around what you should do at each point:
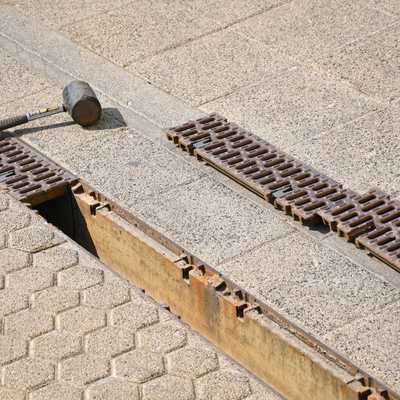
Step 1:
You should start by digging a trench for your underground drainage installation. You’ll need to go deep enough for at least 50mm of compacted sand as a base – and wide enough for a minimum of 100mm backfill of concrete on either side.
Step 2:
Attach a string line to indicate the finishing height of the grate. This should be 2mm lower than the surrounding surface level when finished.
Step 3:
You should allow a 1:200 fall: 5mm for every 1m channel drain section.
Step 4:
Installation of sections should begin at the lowest point – where your section meets the drain. Start with complete channel drainage sections – and use any section that’s required cutting to length at the end; the highest point, furthest from the outlet.
Step 5:
When your first section is in place, subsequent sections will locate themselves with the help of the connecting slots at both ends of the sections and quad connectors. Sections should be installed with the grate in place, allowing for height accuracy against surrounding surfaces.
Step 6:
Fit an end cap to your final section, prior to locating it into your trench. The end cap should always feature at highest point.
Step 7:
The locating grooves on each section should be sealed with silicone sealant to improve leak resistance and increase durability.
Step 8:
Using either an additional end cap or the preformed channel drainage bottom moulding, attach the section to your desired 110mm underground drainage, allowing collected liquids to disperse.
Step 9:
When your sections are in place – but prior to pouring concrete – protect the grated sections with a heavy duty exterior masking tape. Ensure you mask completely, as the grate is often (but not always) designed to be removed. Make sure you use a tape that’s designed to stay in place for at least the amount of time it will take for your concrete to set.
Step 10:
Pour your concrete to create a 2mm height difference above the grate section of your components.
Step 11:
The next step involves waiting! You should leave your concrete for at least 72 hours, allowing adequate curing time before exerting any pressure on the components. This includes weight – so avoid walking or crossing the drains with vehicles, and also includes removing the grate, as the upward pressure could dislodge the drain section body if concrete isn’t 100% set.
Channel Drainage installation do’s and don’ts:
Our 11-step guide is fairly comprehensive and will cover what’s required, whether you’re fitting plastic channel drainage or composite channel drainage. However, there are some crucial channel drainage do’s and dont’s that you need to make sure you observe.
DO: Start at the point where your channel drain sections will meet the drainage run or soakaway. This is likely to be a fixed point – so, if you start elsewhere, even a slight miscalculation or variation in the ground can lead to major adjustments being required.
DO: Ensure you’ve got a connection to a suitable drain or soakaway, without adequate drainage you could cause a build-up of surface water elsewhere on your property.
DO: Mask your grates properly. Concrete over-spilling into the section can be difficult to remove and, if it impedes your ability to open or clean the grate, you might struggle to keep your channel drains free from debris.
DON’T: Direct water so it runs on to or impacts properties near you. You could expose yourself to disputes and legal action if you damage neighbouring homes or properties.
DON’T: Installing drainage channel to foul drains without first gaining written permission from your local authority or council planning department.
DON’T: Exceed the weight tolerance for your channel drainage system. A broken drain grate can cause injury or damage to property, and will often damage the full section, included the fixed moulded body, meaning it then needs to be entirely replaced.
Choosing the right products
Even following our how to install channel drainage guide perfectly, your job and results can still come up short if you don’t select the right products for your channel drain installation.
Quality materials should be guaranteed against breakage before, during and after installation. Also, look for components that are compliant with BS-EN1433 standards as well as carrying the mark of conformity and the British Kitemark Certification Mark.
Find out which channel drainage load rating you should use? Channel drainage load rating explained.
Here at Easymerchant Limited we are often asked which rating will be suitable for the customer’s specific underground drainage needs, and we agree to begin with it can seem fairly confusing. We hope that our handy ratings guide below will make your buying process easier and clear things up for you.
A15 (15kn – load up to or exceeding 3,372 lbs per foot):
Pedestrians & Cyclists Only. A15 rated channel drains are rated to a loading weight of 1.5 ton. As such they’re rated for use in pedestrian areas only. As the weight of most vehicles will exceed the rating.
B125 (125kn – load of at least 28,100 lbs per foot):
Footways, pedestrian areas, car parks, car parking decks, private driveways. Commonly, B125 rated channel drainage systems will be the go-to channel drainage when installing block paving on a driveway / car park. They’re usually sold with either a plastic or a galvanised grating, and often in “garage packs”.
C250 (250kn – load of at least 56,200 lbs per foot):
General parking areas, goods vehicles, slow moving traffic. The C250 rated systems will usually be more than suitable for light commercial applications where medium sized vans or small lorries may operate.
D400 (400kn – design load of at least 89,920 lbs per foot):
Carriageway of roads, hard shoulders, parking areas for all types of road vehicles. For use on highways, carriageways. Suitable for any type of road traffic, and also for commercial areas using forklifts etc.
E600 (600kn – load of at least 134,800 lbs per foot):
Areas imposing high wheel loads ie docks, aircraft pavements etc. Also for use in areas where heavy duty forklifts / tractors or JCB’s may operate.
F900 (900kn – load of at least 202,320 lbs per foot):
Areas imposing particularly high wheel loads ie aircraft runways etc. Strong enough to carry the weight of a fully loaded aircraft. This is the strongest channel drainage rating available.
Shop Channel Drainage:
Out of stock

Out of stock
Can you give me dimensions of channels please,can I purchase in Northern Ireland.
Hello
How close to my house wall can I install a channel drain.
Hi Joe,
You can install the channel drain against the wall if you wish, there is no particular guidance on this.
Thanks
EasyMerchant
Hello,
If not connecting to mains, where should the water go and how do we prep for this?
What a fantastic guide on installing channel drainage! The step-by-step instructions and clear visuals make it seem like a breeze. I appreciate how the blog breaks down the process, making it accessible for both beginners and DIY enthusiasts. The tips and precautions shared ensure a smooth installation, and the overall presentation is top-notch. Kudos for providing such valuable content!