No products in the basket.
Blog
Guttering Bracket Spacing: How Far To Space Them
10
Jan
Jan
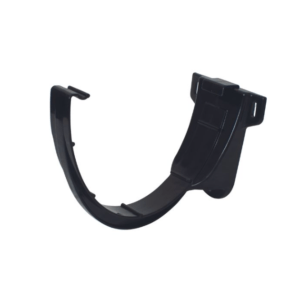
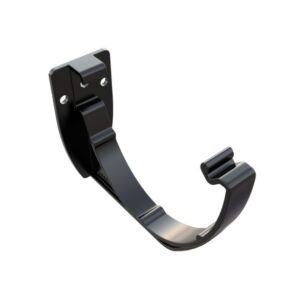
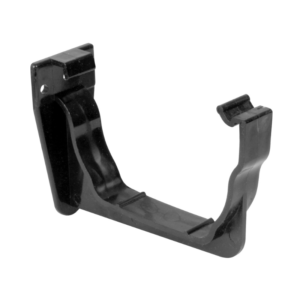
Fascia brackets are the backbone of any guttering system, keeping your lengths of gutter securely attached to the outside of your house come rain or shine. Also known as gutter clips, they are an essential part of the guttering system that holds the gutter lengths in their correct position to keep the rainwater flowing smoothly along. But they can only do their job if you’ve put them up properly – and spacing is one of the most important factors of their installation.
Here, we’ll go over how to install your fascia brackets, the distance they should be spaced apart according to the type, which of your fittings require fascia brackets, how your brackets handle snowfall, and some additional advice.
How to Install Guttering Brackets
Tools required:
- Drill
- Measuring Tape
- Marker Pen
- Spirit Level
- String
Installing gutter fascia brackets is a straightforward process, only involving a bit of measuring, some drilling, and a few screws. Here are the basic steps:
- Identify where to position your running outlet or stop end outlet and then hang a plumb bob over the drain that the rainwater will be discharged into. Fit the Outlet no more than 500mm below the roofline.
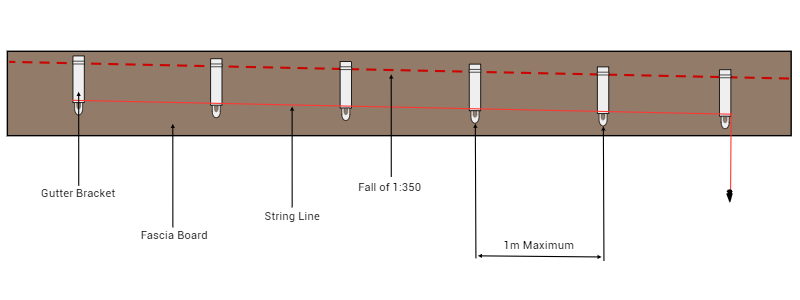
- From the opposite side of the fascia board to the outlet, mark out and fix your first gutter bracket 100mm from the edge of the fascia board, making sure that this bracket is installed higher than the running outlet with a fall of around 3mm per metre. For Example: for 4m of gutter length this bracket should be installed 12mm higher than the outlet. If your Outlet happens to be positioned in the middle of the run then repeat this process for both ends.
- Using a string line tie one end to the bottom of the fascia bracket and the other to the running outlet, make sure the line is tight as this will help you mark out where the rest of the fascia brackets are to be installed. To make sure there is a fall towards the running outlet you can use a spirit level.
- Now you can mark the position of the rest of the brackets, these should be no more than 1000mm apart, and no more than 150mm from any other fitting such as a union bracket or a gutter angle (depening on the type of guttering that is being installed). You can ensure the fall is correctly measured by having the bottom of the string line gently touching the inside of each bracket.
- Once fascia bracket positions are marked out you can now fix them to the fascia board, and then you are ready to clip the guttering into place.
This process can become more complicated if your building doesn’t have a fascia board installed already, or if you need to replace one that is damaged. If this is the case, you’ll have to install a new one before you are able to put new fascia brackets in place. Here are the steps you need to follow to install a new fascia capping board for your brackets:
- Measure your fascia boards to fit the area and cut to the right length (make sure you use treated wood suitable for outdoor use)
- Cut the tops of the boards to match the slope of your roof
- Miter the ends to 45 degree angles so that they fit together well
- Nail the board to the rafter feet with carpentry nails (nail 3-5cm below the roof)
- Seal the gaps with putty
- Cover the top of the boards with metal drip edges
Where Fascia Brackets Should be Installed
You’ll primarily be installing fascia brackets to support your gutter lengths, but there are two types of fittings that also require support from fascia brackets: gutter angles and gutter external stop ends. These fittings both need to be supported with a fascia bracket within 15cm on either side.
Gutter unions, running outlets, and stop end outlets all have fixing lugs built in so that they can attach directly to the fascia board without the need for a bracket. Downpipes and downpipe fittings should be supported by downpipe clips; the downpipe itself should have a clip installed every 180cm for support. You should also install downpipe clips directly underneath any swan neck bends in the system.
Guttering bracket spacing, how far should apart should I space the fascia brackets?
The spacing of your gutter brackets is dependent on your type of guttering. For instance, Ogee guttering would require different fascia bracket spacing to half round guttering. Here is a list of the main types of gutter and how far apart you should position your brackets for each kind:
- Put brackets at 1 metre centres for half-round, deep flow, square guttering and mini guttering systems
- Put brackets at 60cm centres for industrial guttering such as 160mm, 170mm and 200mm
- Put brackets at 80cm for Ogee guttering systems
If brackets are spaced any more widely than this or not enough brackets are installed, the system can become unstable and easily damaged, with the gutter lengths unable to bear the pressure of the load, leading to bends, leaks and even breaks. This is why correctly installing brackets at the right intervals is vital for the support of your whole system.
Fascia Brackets and Snow loading
If you live in a colder climate or an area prone to snow, you should bear this in mind when installing your guttering system. This is because snow can sit in your gutters for some time after a snowfall, and if it rains, the snow will soak this up, increasing the amount of weight your gutters have to bear. Therefore, your brackets may bear a far greater load than you might have expected!
All of the products we sell at EasyMerchant pass British manufacturing standards and come stamped with a kitemark meaning they’ve been tested for their quality and suitability. When it comes to fascia brackets, this means that when correctly spaced as referenced above, the brackets can handle up to a maximum of 75kg of snow. However, you might want to consider a snow guard if the surface of your roof is made from a smooth, slippery material like slate. This will ensure that less snow enters your gutters before it melts.
Fascia Bracket Safety
When installing a fascia bracket or clip, either install scaffolding beforehand or ensure that your ladder is securely on the ground and being held by another person as well as being tied off at the top. Additionally, you should always wear protective gloves and safety goggles when drilling to install your fascia brackets, and when cutting and nailing your fascia boards if that step is required.
Fascia Bracket Advice
If you need some advice on how to choose and install your fascia brackets correctly or information on any other element of gutter and gutter bracket installation, feel free to contact us by phone or email. We sell a variety of fascia brackets and guttering supplies that all meet British manufacturing standards, so you know that you can trust them to keep your gutter system safe and secure.
Shop Guttering:
Out of stock

Sale!