No products in the basket.
Blog
How to Fit Guttering: Installation Guide
20
Oct
Oct
Wondering how to fit guttering yourself? Well, it might look like an intimidating job – but in reality, it’s something that even people with a fairly basic level of DIY knowledge can do. It’s a question we get asked very frequently by our customers, so if you want to know how to fit gutters easily, we’ve put together a detailed guide that’ll take you through every step of the process – making your gutter installation a piece of cake!
Here, we’ll walk you through the full job of how to fit and install gutter – from beginning to end, including:
- Ladder safety
- Components
- Different types of guttering
- Fitting gutters
- How to fix guttering
As well as explaining how you fit gutters; we’ll touch on a few frequently asked questions too, such as:
- How can you make sure your gutter fixings are fitted and are correctly spaced?
- What are the differences between plastic guttering and cast iron guttering?
- Can you cut it?
- Which are the best gutters for sheds?
Since plastic gutter systems are the most popular on the market, we’ll focus mostly on how to install and fit plastic gutter – but many of the principles will be the same if you’re working to install a non-plastic alternative such as cast iron, aluminium or galvanised steel – etc.
Tools Required

You won’t need a huge toolkit to get your new gutters in place – even the most humble DIY toolkit will usually have everything you need:
- A cordless screwdriver / drill
- A spirit level
- A hacksaw
- A pencil
- A silicone lubricant suitable for use on the components you’re working with
- Ladders
- String
Working Safely on Ladders

Whether you’re working on a bungalow or at the top of a block of flats, you’re almost certainly going to be climbing a ladder as part of your installation job. Since even slight accidents with ladders can cause serious injury, it’s helpful to make sure you’re working as safely as possible.
Scary fact! 48,000 people are injured and 40 killed while working at height in the UK each year, and 60% of those include falling while using a ladder or scaffolding. So safety is a must! My time in the fire service taught me the dangers of working with ladders and heights and it’s definitely something to be taken seriously.
Start with a visual inspection of your ladders. Both timber and aluminium can degrade, so check for dents, chips, splits, and separation of any joints and joins. Also, be certain that any rubber or plastic feet are in good condition too – as this will help prevent them from slipping. Ideally, you’ll get someone to work with you to make sure your ladder is secure while you’re attempting to fit your products.
When you position your ladder against your wall, you should be aiming for an angle of 4:1 – so, for every 4ft up, the base should be 1ft from the wall on the floor. If you’re working at the average height of the fascia board a two-storey house, you’ll be working at around 15ft, so you ladder’s feet will need to be on a level surface, around 3.5ft-4ft from the base of the wall. Make sure your ladder is extended to it’s maximum, and consider tying off the ladder with string at the top when at all possible.
Components
Although every house and building is slightly different, the modular nature of plastic gutter means the same standard or very similar components can be used across a huge range of jobs. Generally speaking, you’re going to be using the following:
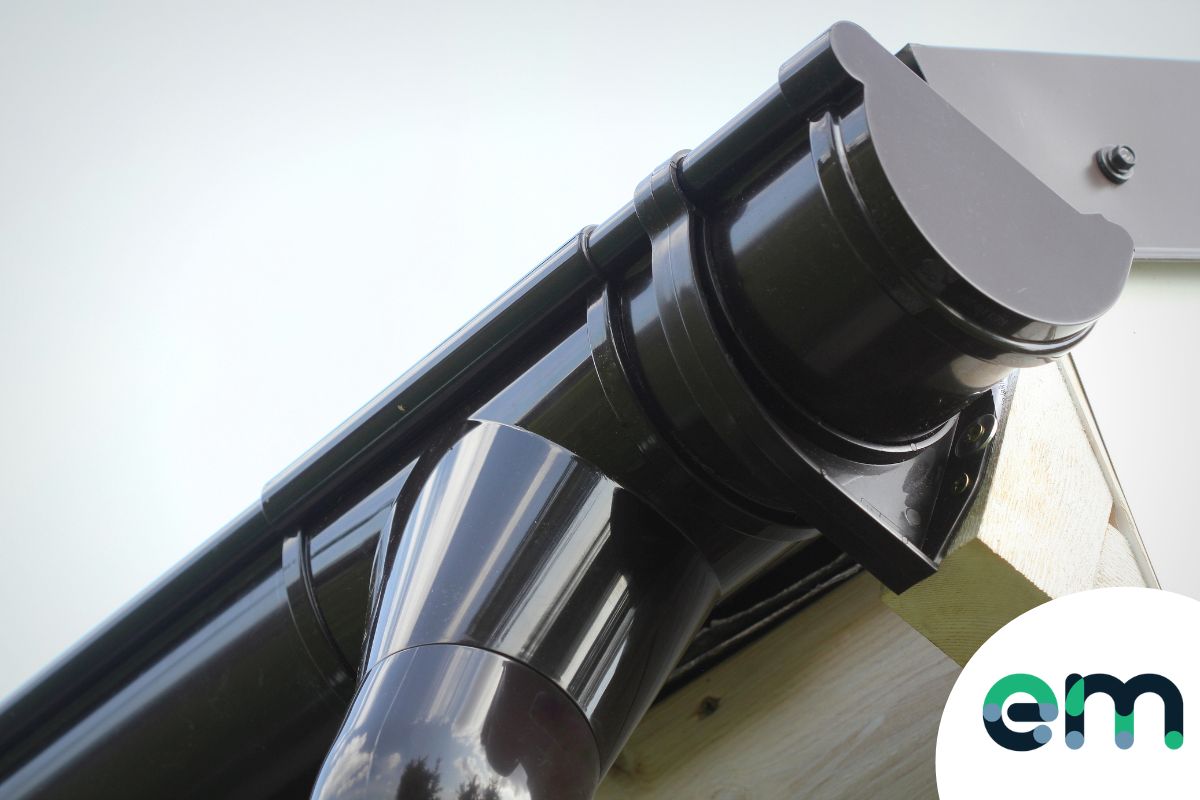
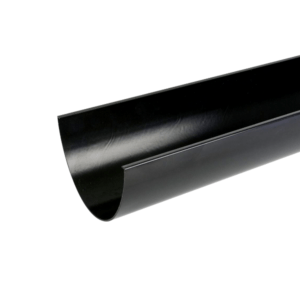
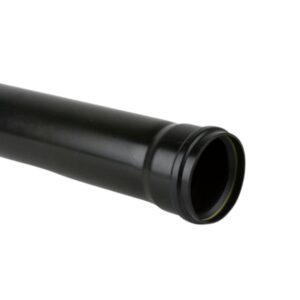
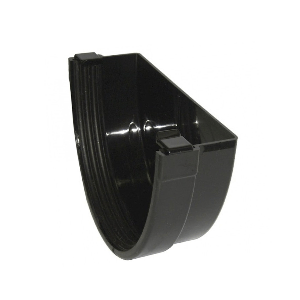
- Round guttering sections – the runs of gutter that will channel the water.
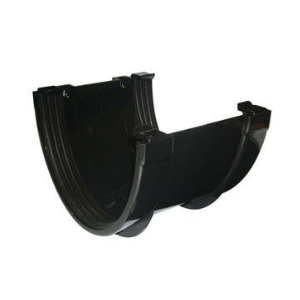
- Running outlet or stop-end gutter outlet – the section that will allow water to drop out of the run, into a downpipe, and into the drain.
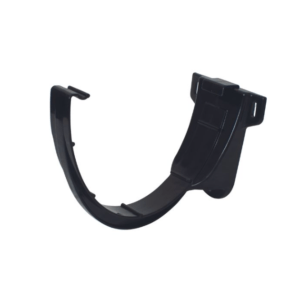
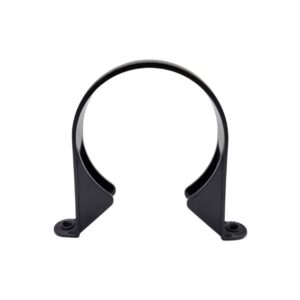
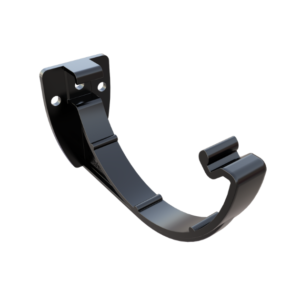
- Gutter brackets – Also known as fascia brackets or support brackets are the fascia-mounted clips that secure the runs of gutter to the fascia capping boards.
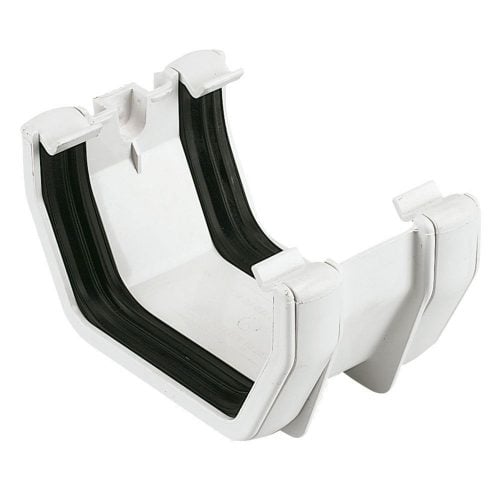
- Gutter union piece – sections that allow you to connect different sections.
- External stop-ends – finishing sections that cap the end of a gutter.
- Gutter bends – allowing for non-standard roof shapes, where a corner’s required.
Different Types

99% of new gutter installations are now done with uPVC plastic components. In the past, where plastic wasn’t commercially available, cast-iron was often the standard used – and, as such, is sometimes needed where a building has been given ‘listed’ status – requiring authentic components to be used.
Don’t worry if you like the look of cast-iron but don’t fancy trying to handle the considerable weight or trying to keep up with the painting needed. Since it’s something you’ll rarely get close enough to touch, there are plenty of superb cast-iron alternatives that combine the authentic look of iron with the practicality (and significantly reduced cost!) of uPVC plastic.
Generally, domestic gutter is 112mm half-round guttering – or sometimes 114mm square guttering. If your roof experiences an abnormally large amount of rain flowing off it, you may need 120mm deep flow gutter – but instances where this is required are fairly rare.
Of course, if you’re hoping to complete an industrial guttering installation, you might need larger sections again – with 160mm, 170mm, and 200mm runs available. Regardless of size and shape, when fitting the principles remain the same and are more than possible for an amateur that’s keen on DIY.
Installation
Step 1
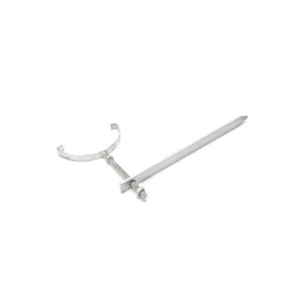
If you want to know how to replace and fit gutters without any errors – your first step should be crucial planning! Hang a plumb bob from the fascia so it hangs directly over the drain that your gutter’s downpipe will run into. Since this step establishes exactly how the rest of it will fit along the property, it’s vital that you get this perfectly aligned.
Step 2
Holding the stop end or gutter running outlet section of gutter in place, mark the overall position and the fixing holes’ positions onto your fascia using a pencil. We’re often asked, “Where should we fit the gutters in relation to the roof?” – the answer is fairly simple: to allow for the drop needed across the full run, you’ll need to make sure you position and fit the gutter outlet around 50mm below the level of the roof – and we’ll work on the fall needed in the following steps.
Step 3
After drilling small pilot holes, fix the gutter stop end or running outlet to the fascia board using the recommended fixings. If you’re using a cordless screwdriver, you might want to drop the speed right down, so you don’t risk over-tightening and damaging any of the plastics or fascia board you’re working with.
Step 4
We’re often asked “How much fall should you put on when fitting it?” – so this next step involves some quick maths to ensure water runs out as it should. Starting from the position of your gutter stop end or running outlet, measure to 100mm from the end of the fascia. You’ll need to fit one of your support brackets at this point – but how close to the roof you fit it will depend on how far from your gutter outlet you are.
Using your spirit level every meter, you’ll raise the height of this gutter bracket by 3mm (conveniently, this converts to just over 1mm for every foot in distance if you’re working in imperial). For example, if this gutter bracket is 4 meters (around 13ft) from the outlet, you’ll need to fit it 38mm from the roof – creating 12mm of drop along the full run.
If you’re using a running outlet the middle of a length, you’ll just have to repeat this process for both ends.
Step 5
Now you’ve got your fascia bracket(s) in place; you should tie a piece of string or brick-line between the fascia brackets you’ve put up and the outlet. Make sure the line is tight, so you’ve got an accurate line between the two.
Now, using a spirit level, you’ll be able to measure the fall on the string. If your initial maths was correct, it should drop approximately 3mm every meter.
Step 6
Again, we’re frequently asked “How far apart should you put gutter hangers on?” – so step 6 covers this in detail!
Take another gutter bracket and work your way back down the line from the final bracket on the fascia towards the outlet. Using the string as a guide (make sure it’s just touching the inside of the gutter bracket and no more) mark where each bracket should go. You’ll need to make sure they’re spaced no more than 1000mm (3.3ft) apart – and no more than 150mm (around 6in) from any offset bends or angles – so measure carefully!
When you’re confident you’ve got your measurements exactly right, fit each gutter bracket with the recommended fixings.
Step 7
Before you actually start to fit the components into place, it’s useful to use a silicone lubricant to lubricate the gutter seals you’ll find on your various union fixings, gutter outlet, offset bends, and other fittings. This will generally mean you don’t have to put too much pressure on them to fit them together – and it helps to stop water leaking as a result of expansion and contraction.
Step 8
Now, you’re ready to start snapping your gutters into place. Starting at the outlet end, place the first length of gutter in place – slotting the rear of the run into place first. You’ll notice it sits under the support bracket. Gently but firmly, push down on the front of the gutter until it snaps into position.
Step 9
When your first length is level and in place, it’s time to fit a union bracket – allowing easy connection of the next section. It should only need a little pressure to fit to the first length you put in place – then you’re ready to use the provided fittings to fit it to the fascia.
Step 10
Now your union bracket is fitted into place; you can connect your next section of gutter. Union brackets have a minimum insertion depth marked on them – allowing the water to drain as it should, and making sure there isn’t too much pressure put on the gutter section. The section will snap into the pipe clip in the same way it does with each bracket.
Step 11
Working your way along the fascia board, continue snapping your gutters into each gutter fascia bracket pipe clip as you go.
Step 12
If you were interested to know if you could cut guttering – the answer is a definite yes. In fact, unless you happen to be very lucky, you’ll almost certainly need to cut the last section to get it to fit into place. Measure the final gap, mark your guttering up accordingly, and use a hacksaw to cut it down to size until it’s a perfect fit.
Step 13
When your final section is clipped into place, you’re ready to fit an external stop-end to finish the run. As long as you’ve followed step 7 and used some silicone spray, this should slide on without too much pressure.
Fitting Your Downpipe
Now your guttering’s fitted into place; you’re ready for fitting your downpipe.
You’ll need to use your plumb bob again – dropping it through the outlet to give you a perfectly straight guide down the wall. Make sure you mark this straight drop on the wall – showing where the downpipe will be.
There’s a chance you’ll need to use offset bends to bring the downpipe run close to the wall. Make sure you place pipe clips directly under these – and at 1.8m (around 5ft 9inches) intervals as you secure the downpipe further down the wall.
If connecting lengths of downpipe is required, use a pipe socket and downpipe clip again – making sure you’ve used silicone lubricant to ease the fitting and make sure everything’s watertight. When you reach the bottom of the run, you’ll be able to fit a downpipe shoe; directing the flow perfectly into your drain.
How to Fit Gutters to a Shed

Lots of people get in touch with the team here with questions about how to put up gutter for sheds. In truth is, fitting guttering to a shed is a very similar job fitting gutters onto a house – so, for the most part, you can check and follow the instructions we’ve laid out above.
Shed guttering often runs into a water butt instead of a drain – so you’ll need to direct your downpipe accordingly. Also, gutters fitted for a shed might need a little more support – as you’ll potentially be fixing into boards that are slightly less sturdy than a fascia. As such, gutter brackets may need to be slightly closer together, reducing any strain from the rainwater slightly.
Again, use a spirit level to check and make sure you’ve got an adequate fall – and put a couple of buckets of rainwater in your water butt – making sure the wind doesn’t remove it and damage your hard work!
Shop Guttering
Sale!
Sale!
Sale!
Sale!
I used DS100 dry silicone spray for almost identical job and can recommend it
Great tips and advice.
I need to replace my conservatory roof guttering as I cannot find the correct gutter bracket (2 have snapped due to weathering). Unfortunately, they are no longer manufactured so I am looking at purchasing a new run of conservatory guttering with the relevant brackets. When I had a look at the existing guttering it appears that standard screw brackets have been used on a twist and snap shut (not sure of the correct jargon but basically no screw system).
Is it ok to use standard screw brackets to a conservatory roof which has the twist/snap shut system installed? Thank you
How do i join square/half round guttering together
My spouting doesn’t drain (the down pipe is on my neighbours side) there is a wire possibly causing this in my neighbours spouting but before I say anything I will use a spirit level to see if the spouting is angled correctly to allow the water to gently drain
Thanks for information. I work on Guttering business company. I got some further tips after reading your article.
I didn’t know about your company until now, we are a installer of fascia soffit guttering in Letchworth Hertfordshire
There are nasty things lurking in the old gutters and you will certainly make some sort of contact with them when working. So correct protection, washing of hands and disposal is a must